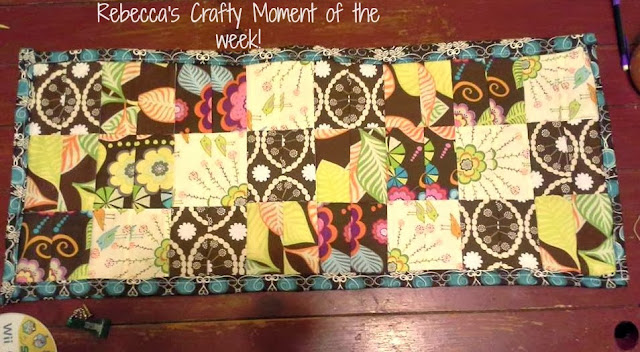
I have decided that I love quilting, I have also decided that I have a ton of fabric but very few pieces that go well together. In the mix I have odd and end pieces but while I was digging through my stash, I found a really cute strip pack that I had picked up at Hancock Fabrics several months ago. My mind says 'it would be so cute as a quilt' while in reality, you need more than one strip pack to make a quilt top. I wanted to make something Fall related this week to spruce up our house. We already have the Bath and Body Works candles in Sweater Weather and Autumn.
I don't know how many of you have ever joined Craftsy but it is pretty cool. You can find patterns, classes, tutorials, network with other crafty people, and supplies. My favorite part? I've gotten a TON of FREE patterns. I have a favorite saying, if it's free, it's for me. I love free stuff. Now if we could just get free fabric, that would be awesome.
I was looking around the other night and I found a pattern for a table runner that I thought was really simple (best part- it was free) and that fabric I found would be perfect as well for a fall table runner. The pattern can be found here. For this pattern, you need (24) 4 1/2 inch squares, 1/3 to 1/2 of a yard of fabric for the backing, Binding material unless you choose to use the backing fabric, Crib size batting (I cut mine to be 16x36 I believe), a sewing machine, rotary cutter and mat, and an iron. (A camera will also be helpful because we would LOVE to see your creations :) )
With the strip pack I had found I took two strips from each design and sewed them together right sides together, pressed the seams to one side and used my 4 1/2 inch square ruler to cut the squares out I was able to get 9 squares out of each piece. I used 6 of each and laid them out into a pattern that I wanted to use, I have become very fond of the diagonal pattern.
Afterwards, I took the first two columns having a total of six squares laid right sides together and sewed a 1/4 inch seam longways. I found it was easiest to sew two rows at a time and then once you have two sections with 4 rows sewing them together rather than doing row by row.
Cut your backing and batting a few inches bigger than the quilt top.

Here is the finished product, in it's permanent home on my coffee table.
I am really happy with how it turned out, I am still learning how to do binding. The pattern on Craftsy is free, I would love to see what you guys come up with!
Stay Crafty,
Rebecca


No comments:
Post a Comment